Hello fellow Data Enthusiasts and welcome to my Blog,
today we’re checking out how to ingest data into Azure Synapse with Pipelines and the Copy Data Task.
Before you start into this post please make sure you know how dynamic linked services work, since we’ll use this here.
Integration Dataset
If you’ve created a dynamic linked service you could get startet with an Integration Dataset. An Integration Dataset is a logical reference to your data. Probably the best feature here is, that they can work schemaless, so you don’t need a new Integration Datset for each source you want to extract.
In order to create one, select the Data tab and then change the view to ‘Linked’. Click the + sign and select ‘Integration Dataset’.

This will open a dialogue which lets you choose all the different sources. In my case I want to Ingest some Files, which are stored on a Datalake.

The Azure Data Lake Storage Gen2 connector has two steps, where you first select the actual connector and afterwards select which kind of files you want to read/write.

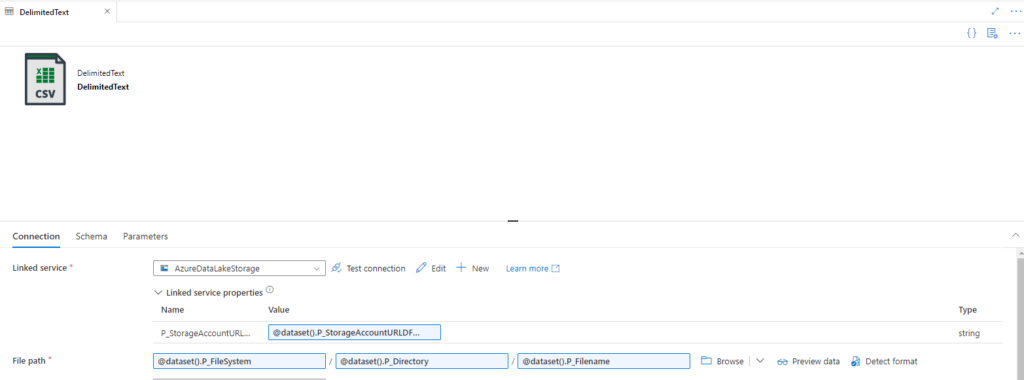
Here is an example how the csv connection looks like. Just type a descriptive name and select the linked service, then you’re ready to go.

After creation start to create parameters, since we want to use the same dataset for all csv files that are available for the selected runtime.

Now its possible to add dynamic content to the filepath and the Parameter of the dynamic linked service.

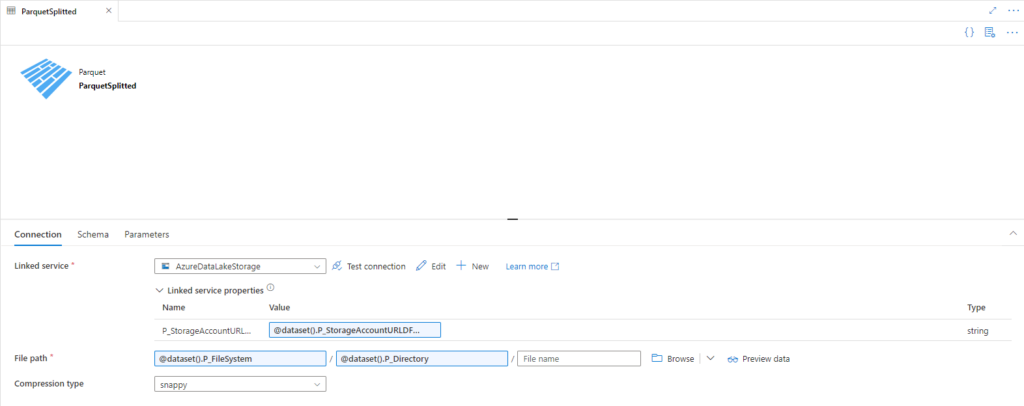
Do the same steps for a parquet integration dataset. I usually try to store the bronce layer in parquet format, since the most ETL tools can work with that. Parquet also supports datatypes, which is nice for sources that also have some kind of metadata.

Pipeline
Pipelines in Azure Synapse are containers for simple logical tasks, that needs to be executed in a certain order. On Pipline level all the tasks are called Activities. I recommend to create a folder structure for the different layers. To create a Pipeline simply click on the Integrate Symbol and afterwards on the + for the Pipeline option.

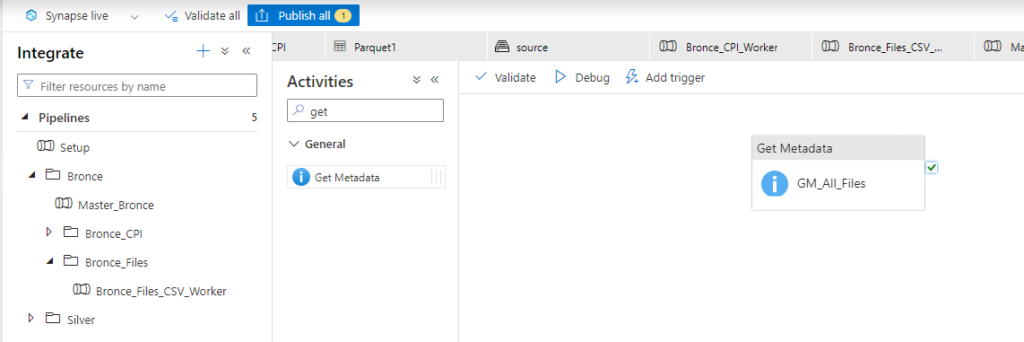
In order to process all files in a certain folder in the Datalake, we have to start with getting all the filenames. The correct activity to do so, is called ‘Get Metadata’.

If you’ve create a get Metadata activity, it needs to be connected to an integration Dataset. All the Parameters that were created in the Integration Dataset before are shown here, to provide some values. The Get Metadata Task has a mandatory option which is called ‘Field List.’

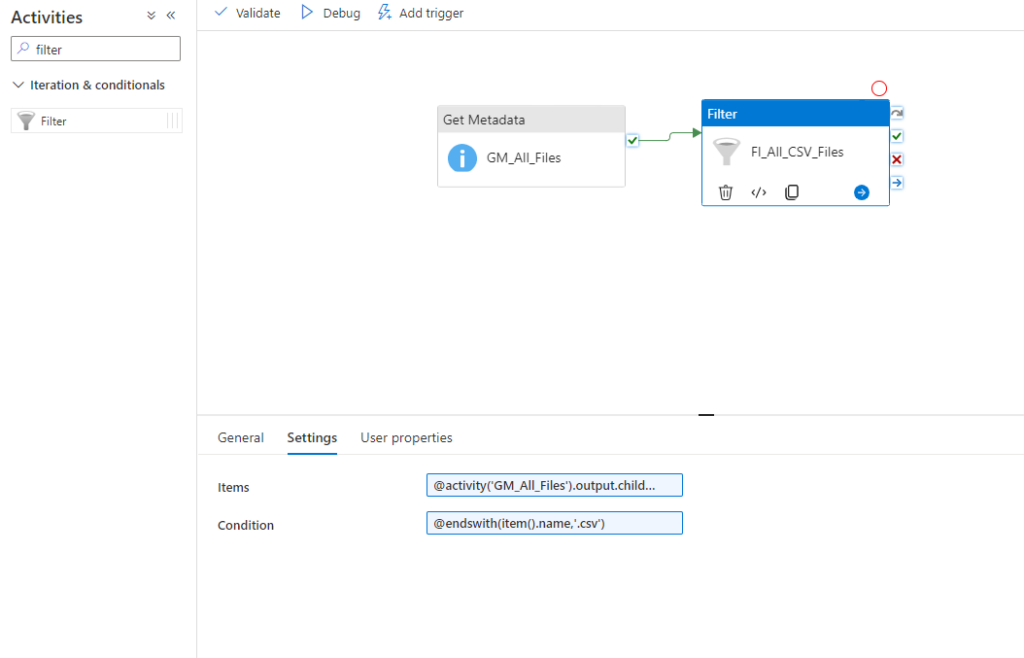
In order to get the list of all Child Items (aka Files/Folders) you need to use this formular: @activity(‘GM_All_Files’).output.childItems
Now you can create a Filter activity to which filters for example for a certain filename like this: @endswith(item().name,’.csv’)

To iterate over all files add an ForEach activity, where you define to loop over @activity(‘FI_All_CSV_Files’).output.Value.

Within this loop its possible to add multiple activities. In our case we want to use a copy data task where we define the filename as the name of the current item. You can refer to the current item like this @item(). Afterwards you have access to all properties. In our case we want the name property.

As sink we use the parquet linked service. I usually recomment to use the same name as the source name and just replace the filetype.

I hope this little guide gave you a short introduction into Synapse Pipelines and how to ingest data with it into a data plattform.
Leave a Reply